Sale on canvas prints! Use code ABCXYZ at checkout for a special discount!

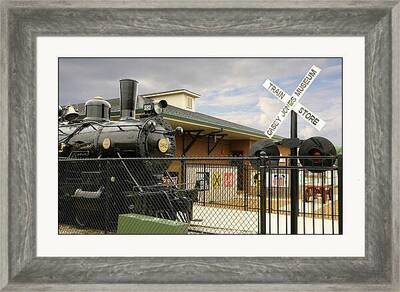
When it comes to framing and mounting your fine art photos, selecting the right frame is key to enhancing the overall aesthetic and presentation of your artwork. The frame you choose should complement your photo without overpowering it, enhancing its beauty and bringing attention to the details within the image.
One important factor to consider when selecting a frame is the style of your artwork. If your photo has a minimalist and modern feel, a sleek and simple black or white frame may be the perfect choice. On the other hand, if your photo has a more traditional and ornate style, a gold or wood frame with intricate detailing may be more appropriate.
Another consideration when choosing a frame is the size and orientation of your photo. A larger photo may benefit from a wider frame to provide balance, while a smaller photo may look best with a thinner frame to avoid overwhelming the image. Additionally, consider the orientation of your photo - a landscape photo may look best with a wide frame, while a portrait photo may be better suited to a taller frame.
Ultimately, the frame you choose should enhance and elevate your fine art photo, drawing the viewer's eye to the beauty of the image itself. Take your time to select a frame that complements your artwork, and consider experimenting with different frames to see which one best showcases your photo in all its glory.
Properly mounting your fine art photos is essential to preserving their quality and enhancing their visual appeal. Whether you're displaying them in your home or preparing them for an exhibition, here are some tips to ensure your artwork is showcased to its best advantage.
First and foremost, use acid-free materials to mount your fine art photos. Acid-free mats and backing boards will help prevent damage to your prints over time, ensuring they look their best for years to come. Additionally, make sure to avoid using any adhesive materials that may damage the artwork, such as tape or glue. Instead, opt for archival photo corners or mounting strips to secure your prints in place without causing any harm.
When framing your fine art photos, consider using UV-protective glass or acrylic to prevent fading and discoloration from exposure to sunlight. This will help preserve the vibrancy of your prints and ensure they retain their original colors. Additionally, choose a frame that complements the style and aesthetic of your artwork, whether it's a sleek modern design or a classic ornate frame. The right frame can enhance the overall presentation of your fine art photos and draw attention to the details of the image.
Finally, take care to properly clean and maintain your framed fine art photos to keep them looking their best. Use a soft, lint-free cloth to gently dust the surface of the frame and glass, and avoid using any harsh cleaning agents that may damage the artwork. Regularly inspect your framed prints for any signs of wear or damage, such as scratches or discoloration, and take the necessary steps to repair or replace any damaged components to ensure your fine art photos remain in pristine condition.
Consider using two mats of different colors to create a layered effect around your photo. This can add depth and visual interest to your artwork.
Instead of sticking to plain colored mats, try using mats with intricate patterns or textures. This can add a unique touch to your photos and complement the theme or style of the artwork.
For a modern and minimalist look, try floating your photo within the mat by leaving a gap between the photo and the mat border. This can create a sleek and contemporary display for your fine art photos.
Experiment with using mats that are larger than the standard size to create a bold and dramatic framing effect. This can draw attention to the artwork and make it a focal point in any room.
If you have a specific vision in mind for how you want your photos to be framed, consider getting custom cut mats. This allows you to choose the exact dimensions, colors, and shapes of the mats to perfectly suit your artwork.
Once you have framed your fine art photos to perfection, the next step is to hang them in a way that showcases them in the best possible light. Follow these simple steps to hang your masterpieces with precision and style:
Step 1: Choose the Right Location
Before you start hammering nails into your walls, take a moment to consider the best location for your fine art photos. Make sure the space is well-lit and free from distractions. Think about the size and orientation of your photos and how they will fit on the wall.
Step 2: Gather Your Tools
You will need a hammer, nails, a level, measuring tape, and possibly picture hanging wire or hooks depending on the weight of your photos. Make sure you have everything you need before you begin.
Step 3: Measure and Mark
Using your measuring tape, determine the desired placement of your photos on the wall. Use a pencil to mark the spots where you will hang your photos, making sure they are level and evenly spaced. This step is crucial for achieving a professional look.
I hope you enjoyed this quick tutorial about framing and hanging your fine art photos. Please check back regularly to see more tips and new picture additions. Thanks!